Installing a Flash DIMM in the Hewlett
Packard Laserjet 8000/9000 series. 
CAUTION
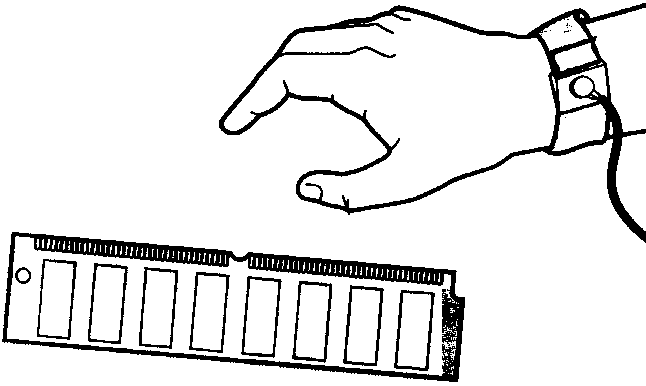
DIMM boards and your printer formatter board can be damaged
by small amounts of static electricity. When handling a
DIMM or other board, wear an antistatic wrist strap connected
to the metal frame of the printer (or to your antistatic
system). During installation, to prevent generation of static
electricity, avoid moving about the work area.
To avoid damaging the parts, follow these steps:
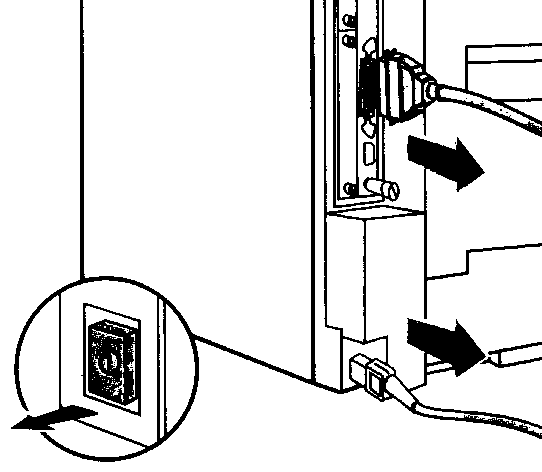
- In this order, switch the printer power OFF, unplug
the power cord, and disconnect any attached cables.
- Loosen (but do not remove) the two captive screws.
If you are not wearing an antistatic wrist strap, touch
the printer's bare metal plate to discharge any static
charge on your body.
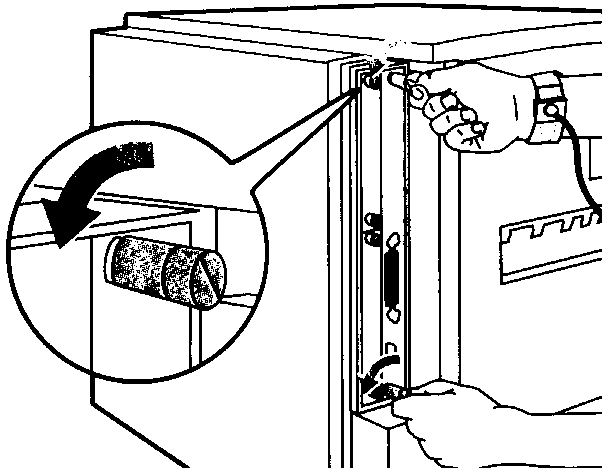
- Grasp the screws and pull the printer controller board
out of the printer. Do not touch any component on the
board. Place the board on a flat, nonconductive surface.
(For ease of replacement, note how the board fits into
slots in the printer.)
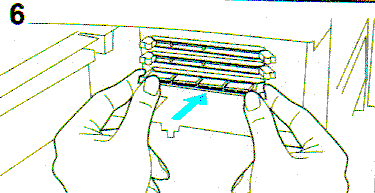
- Remove the DIMM board from the antistatic package.
Do not touch any component on the DIMM board. Hold the
board with your forefingers on the side edges and your
thumbs against the back edge. Align the notches on the
DIMM with the DIMM slot. (Check that the locks on each
side of the DIMM slot are open, or outward.)
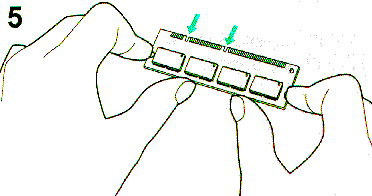
- Press the DIMM straight into the slot (press firmly).
Make sure the locks on each side of the DIMM snap inward
into place. (To remove a DIMM, the locks must be released.)
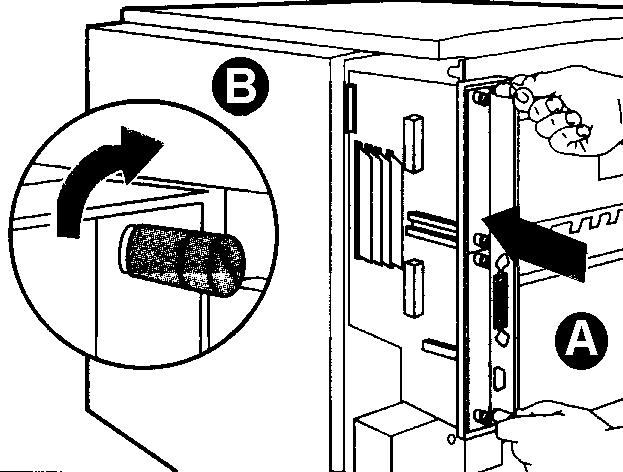
- Align the printer formatter board with the top slot,
slide the board back into the printer (A), and tighten
the two screws (B).
- Re-attach any cables and the power cord; then switch
the printer power ON.
Checking Memory Installation
Follow this procedure to verify that DlMMs are installed
correctly:
- Check that the printer's control panel displays READY
when the printer is turned on. If an error message appears,
a DIMM might have been incorrectly installed. Check the
printer messages section of the printers users manual.
- Print a new configuration
page.
- Check the memory section on the configuration
page. and compare it to the configuration
page. printed before the DIMM installation. If the
amount of memory has not increased, the DIMM might not
be installed correctly (repeat the installation procedure)
or the DIMM might be defective (try a new DIMM).
Use the configuration page to view current printer settings,
to help troubleshoot printer problems, or to verify installation
of optional accessories, such as memory (DlMMs), paper trays,
and printer languages. If an HP JetDirect print server card
is installed (HP LaserJet 8000 N/8000 TN printers), a JetDirect
configuration page will print out as well.
To print a configuration page:
- Press [Menu] until INFORMATION MENU appears.
- Press [Item] until PRINTER CONFIGURATION appears.
- Press [Select] to print the configuration page.
On the HP Laserjet 9000, you can enter "22" on the number
key pad while the display shows ready to print the configuration
page.
Use the file directory page to view current contents of
the Flash DIMM
To print a configuration page:
- Press [Menu] until INFORMATION MENU appears.
- Press [Item] until PRINT FILE DIRECTORY appears.
- Press [Select] to print the configuration page.
Note which FSA device number the DIMM is listed under.
If the DIMM is the only FSA device installed in the printer
(no hard drive or second Flash DIMM), it should be device
0.
Other
Note: Some models of this printer come with the IEEE-1284
C connector rather than the more standard B type for the
parallel port. If you plan to use a parallel cable to connect
the printer to a Workstation or Print Server, please be
aware that you will need an IEEE-1284AC cable. These are
hard to find and more costly.
|